
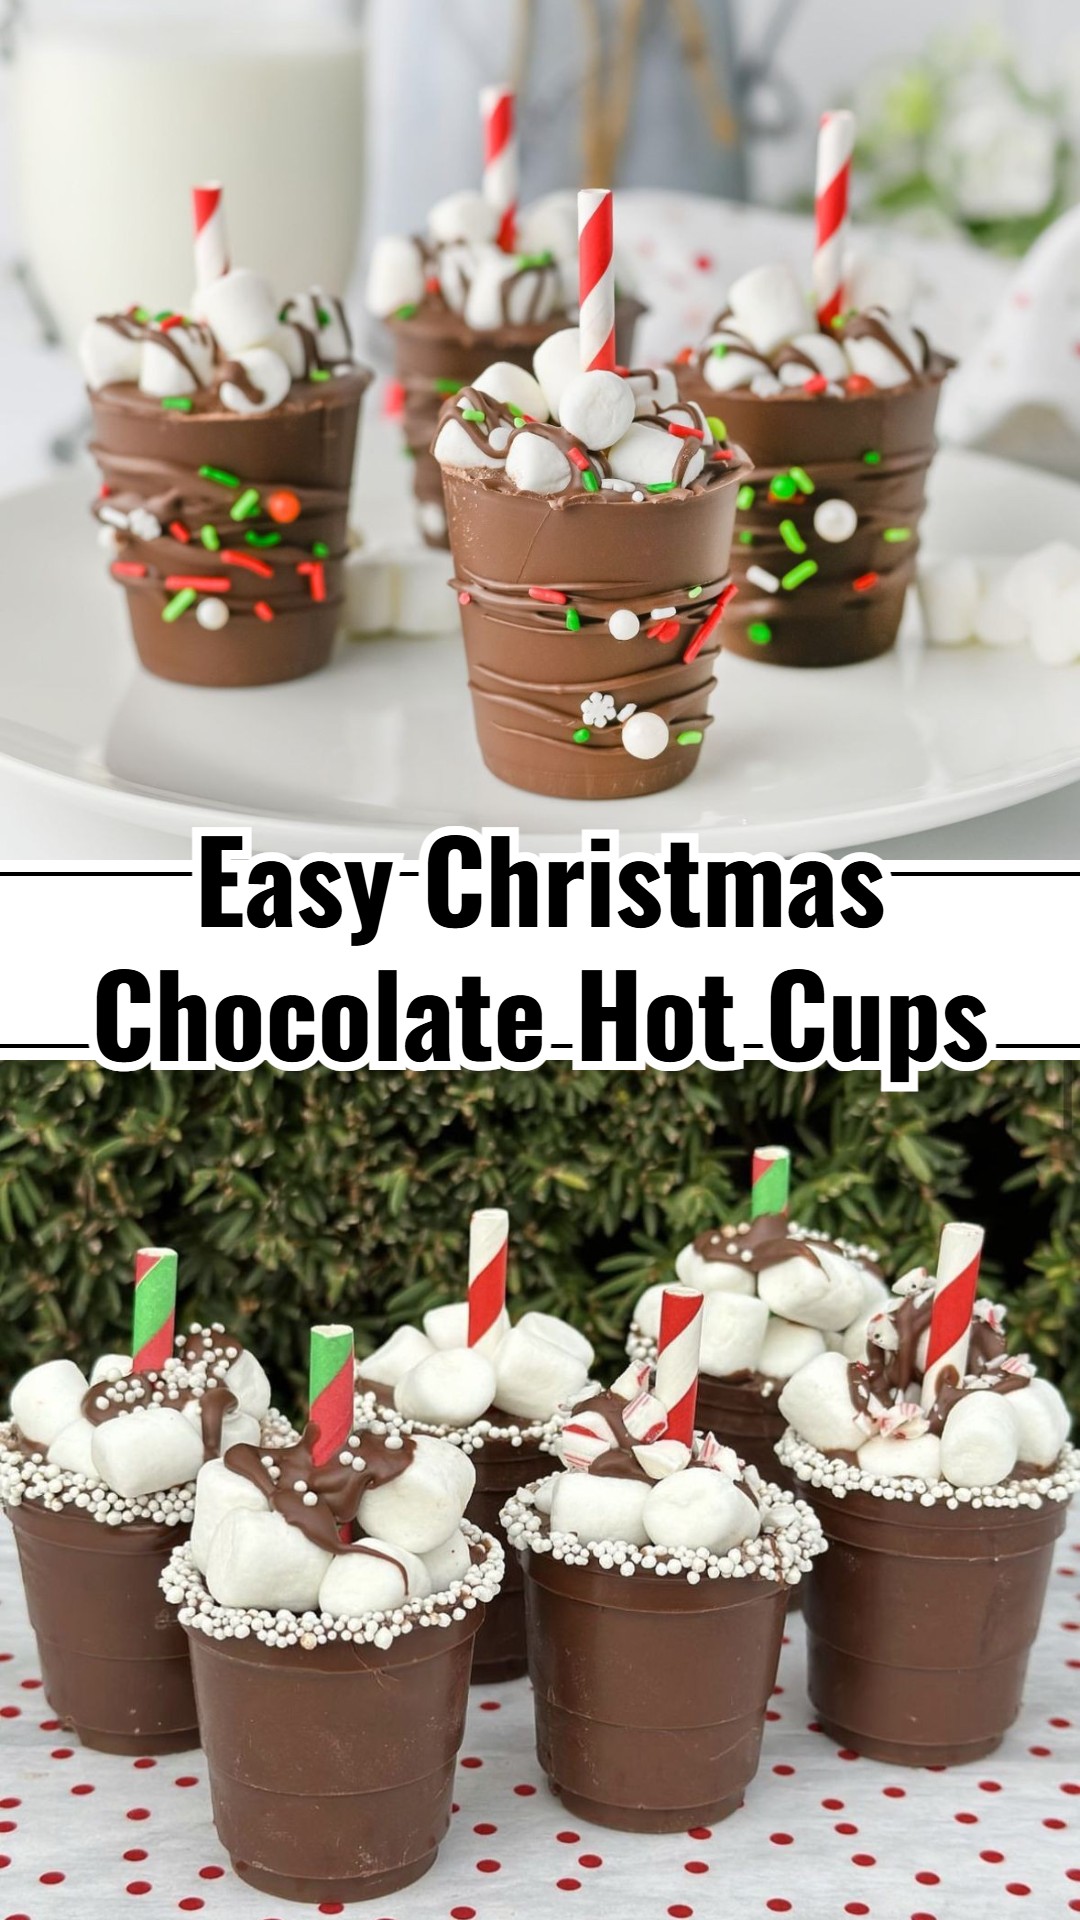
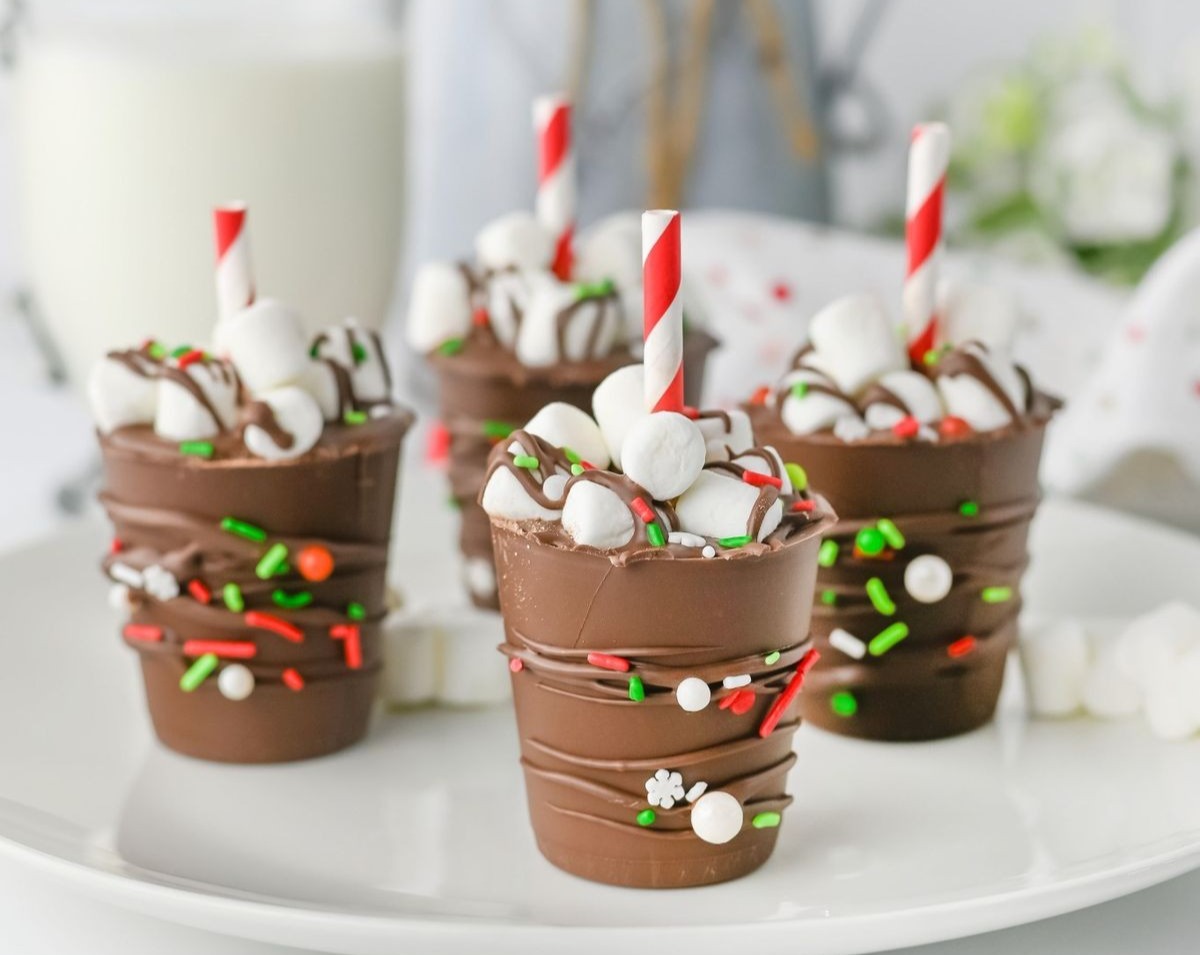
Hello, fellow food lovers! Are you searching for that perfect, delicious holiday treat that’s also surprisingly easy to make? Look no further than our incredible Christmas Chocolate Hot Cups! These aren’t just a delightful way to enjoy a warm beverage; they’re a magical experience waiting to unfold in your mug. Imagine the pure joy of pouring hot milk over a beautifully crafted chocolate shell, watching it melt away to reveal a treasure trove of cocoa and mini marshmallows. They’re a fantastic, simple project for any skill level, making them ideal for busy holiday schedules. Whether you’re planning charming Xmas sweets gift ideas, need easy Christmas treats to sell, or simply want a special moment of indulgence, these hot cups deliver. Get ready to infuse your holiday season with warmth, deliciousness, and that special homemade touch!
Equipment Needed
- Silicone sphere molds (or muffin liners for a less ‘cup’ shape)
- Microwave-safe bowls
- Spoon or pastry brush
- Small saucepan
- Mugs
Ingredients
- 12 oz good quality melting chocolate (milk, dark, or white)
- 1 cup hot chocolate mix (your favorite brand)
- 1 cup mini marshmallows
- Optional: Sprinkles
- Optional: Crushed candy canes
- Optional: Chocolate drizzle
- Optional: Cocoa powder
- Optional: Cinnamon stick for garnish
Shopping List
- Pantry: 12 oz melting chocolate (milk, dark, or white), 1 cup hot chocolate mix, 1 cup mini marshmallows
- Baking & Decorating: Sprinkles (optional), crushed candy canes (optional)
- Spices: Cocoa powder (optional), cinnamon sticks (optional)
Instructions
- Melt the chocolate: Place melting chocolate in a microwave-safe bowl. Microwave in 30-second intervals, stirring after each, until smooth and fully melted. Alternatively, use a double boiler.
- Coat the molds: Spoon a small amount of melted chocolate into each cavity of your silicone sphere mold. Using the back of the spoon or a pastry brush, spread the chocolate evenly up the sides of the mold, ensuring no thin spots. Repeat for all cavities, making sure to create at least two halves per hot cup. For a ‘cup’ shape, you only need one half per cup, but ensure the rim is thick enough.
- Chill: Place the molds in the refrigerator for 10-15 minutes, or until the chocolate is firm and easily releases from the mold.
- Assemble the cups: Carefully remove the chocolate halves from the molds. Fill half of your chocolate shells with 2 tablespoons of hot chocolate mix and a generous handful of mini marshmallows. Add any desired sprinkles or crushed candy canes.
- Seal the cups: Warm a clean, empty plate or a flat pan in the microwave for a few seconds. Take an empty chocolate half and gently press its rim onto the warm plate for a second or two to slightly melt the edge. Immediately press this warmed edge onto the filled chocolate half to create a sealed sphere or cup. If making a ‘hot cup’ where you only use one half, ensure the rim is sturdy.
- Decorate (optional): Drizzle with extra melted chocolate, sprinkle with more festive decorations, or dust with cocoa powder. Let them set completely.
Tips & Variations
- Achieving perfect, delicious results with your Christmas Chocolate Hot Cups is simple with these easy tips:
- Choose Quality Chocolate: Using good quality melting chocolate or wafers makes a huge difference in both flavor and how smoothly your cups form and melt. It’s an easy step that elevates the deliciousness!
- Even Shells for Easy Melting: Aim for an even, medium-thick chocolate coating in your molds. Too thin, they might break; too thick, and they’ll take longer to melt into your delicious hot chocolate. A double coat can add strength.
- Flavor Adventures: While classic is great, feel free to get creative! Add a tiny dash of cinnamon, a drop of peppermint extract to the chocolate, or a sprinkle of espresso powder to the cocoa mix for an extra flavor kick.
- Simple Storage: Store your beautiful hot cups in an airtight container at room temperature, away from direct heat or sunlight, to keep them fresh and ready for delicious enjoyment.
- Gifting Made Easy: These make fantastic edible gifts! Package them in clear bags with a festive ribbon and a small tag with instructions for a thoughtful, homemade present.
Serving & Storage Suggestions
Serving these Delicious Easy Christmas Chocolate Hot Cups is part of the fun! Present them in your favorite festive mugs, ready for guests to pour steaming hot milk over them and watch the magic happen. The melted chocolate creates a truly rich and decadent hot chocolate. For an extra touch of delicious indulgence, offer toppings like a dollop of freshly whipped cream, a sprinkle of cocoa powder, festive sprinkles, or even a peppermint stick for stirring. They make a wonderful, interactive dessert at holiday gatherings or a charming take-home favor. If you’re planning ahead, these chocolate cups are also perfect as edible Christmas treats to sell or give as thoughtful gifts. Store any remaining hot cups in an airtight container at room temperature for up to two weeks, keeping them away from direct heat or sunlight to preserve their delicious integrity.
I truly hope you enjoy making and savoring these Delicious Easy Christmas Chocolate Hot Cups! They are such a fantastic, simple way to add a touch of magic and deliciousness to your holiday season. We love seeing your creations, so please share your thoughts and photos in the comments below – tell us about your favorite fillings or how you presented them! Happy holidays and happy cooking, everyone! #ChristmasTreatsRecipesEasy #ChristmasFoodIdeasRecipes #ChocolateChristmasRecipes #EasyChristmasTreatsToSell #FallGoodiesDessertRecipes #TreatsChristmas #XmasSweetsGiftIdeas #ChristmasHotChocolateIdeas #WhatToMakeForChristmas
Delicious Easy Christmas Chocolate Hot Cups for Holiday Treats
Whip up these delightful Christmas Chocolate Hot Cups, an incredibly easy and delicious way to enjoy a festive treat or create charming homemade gifts.
Ingredients
- 12 oz good quality melting chocolate (milk, dark, or white)
- 1 cup hot chocolate mix (your favorite brand)
- 1 cup mini marshmallows
- Optional: Sprinkles
- Optional: Crushed candy canes
- Optional: Chocolate drizzle
- Optional: Cocoa powder
- Optional: Cinnamon stick for garnish
Instructions
- Melt the chocolate: Place melting chocolate in a microwave-safe bowl. Microwave in 30-second intervals, stirring after each, until smooth and fully melted. Alternatively, use a double boiler.
- Coat the molds: Spoon a small amount of melted chocolate into each cavity of your silicone sphere mold. Using the back of the spoon or a pastry brush, spread the chocolate evenly up the sides of the mold, ensuring no thin spots. Repeat for all cavities, making sure to create at least two halves per hot cup. For a 'cup' shape, you only need one half per cup, but ensure the rim is thick enough.
- Chill: Place the molds in the refrigerator for 10-15 minutes, or until the chocolate is firm and easily releases from the mold.
- Assemble the cups: Carefully remove the chocolate halves from the molds. Fill half of your chocolate shells with 2 tablespoons of hot chocolate mix and a generous handful of mini marshmallows. Add any desired sprinkles or crushed candy canes.
- Seal the cups: Warm a clean, empty plate or a flat pan in the microwave for a few seconds. Take an empty chocolate half and gently press its rim onto the warm plate for a second or two to slightly melt the edge. Immediately press this warmed edge onto the filled chocolate half to create a sealed sphere or cup. If making a 'hot cup' where you only use one half, ensure the rim is sturdy.
- Decorate (optional): Drizzle with extra melted chocolate, sprinkle with more festive decorations, or dust with cocoa powder. Let them set completely.
