Welcome to Delicious Easy Cooking, where we believe delectable treats don’t have to be complicated! Are you searching for that perfect sweet indulgence that comes together in a flash, no oven required? Look no further! These sensational 4-Ingredient No Bake Oreo Balls are about to become your new go-to. We know the classic Oreo truffle often involves cream cheese or condensed milk, but we’ve cracked the code to making them just as rich and satisfying without those extra steps or ingredients. Imagine biting into a rich, chocolatey sphere bursting with that beloved Oreo flavor and satisfying crunch, all crafted from simple pantry staples. Perfect for unexpected guests, a last-minute party contribution, or a fun afternoon activity with the kids, these delightful bites are truly effortless. Get ready to create a dessert that tastes gourmet but takes minimal effort – a true win-win for any home cook!
Equipment Needed
- Food processor or rolling pin and a large zip-top bag
- Large mixing bowl
- Rubber spatula or spoon
- Small microwave-safe bowl (for melting chocolate)
- Baking sheet
- Parchment paper or wax paper
- Measuring cups and spoons
Ingredients
- 1 (14.3 oz) package Oreo cookies
- 1/2 cup unsalted butter, melted
- 1 teaspoon vanilla extract
- 10-12 oz chocolate melting wafers or chocolate chips
Shopping List
- Pantry: 1 (14.3 oz) package Oreo cookies, 10-12 oz chocolate melting wafers or chocolate chips
- Dairy & Eggs: 1/2 cup unsalted butter
- Baking & Spices: 1 teaspoon vanilla extract
Instructions
- Prepare the Oreos: Place the entire package of Oreo cookies (cream filling and all) into a food processor. Pulse until finely ground into crumbs. If you don’t have a food processor, place the cookies in a large zip-top bag and crush them with a rolling pin until fine.
- Combine ingredients: Transfer the Oreo crumbs to a large mixing bowl. Add the melted butter and vanilla extract. Mix well with a rubber spatula or spoon until the mixture is thoroughly combined and starts to come together.
- Form the balls: Roll the mixture into 1-inch balls. The mixture should be easy to handle and hold its shape. Place the formed balls on a baking sheet lined with parchment paper or wax paper.
- Chill: Place the baking sheet with the Oreo balls in the refrigerator for at least 30 minutes to firm up. This will help them hold their shape when coating.
- Melt the chocolate: While the balls are chilling, melt the chocolate melting wafers or chocolate chips. You can do this in a microwave-safe bowl in 30-second intervals, stirring after each, until smooth. Alternatively, use a double boiler.
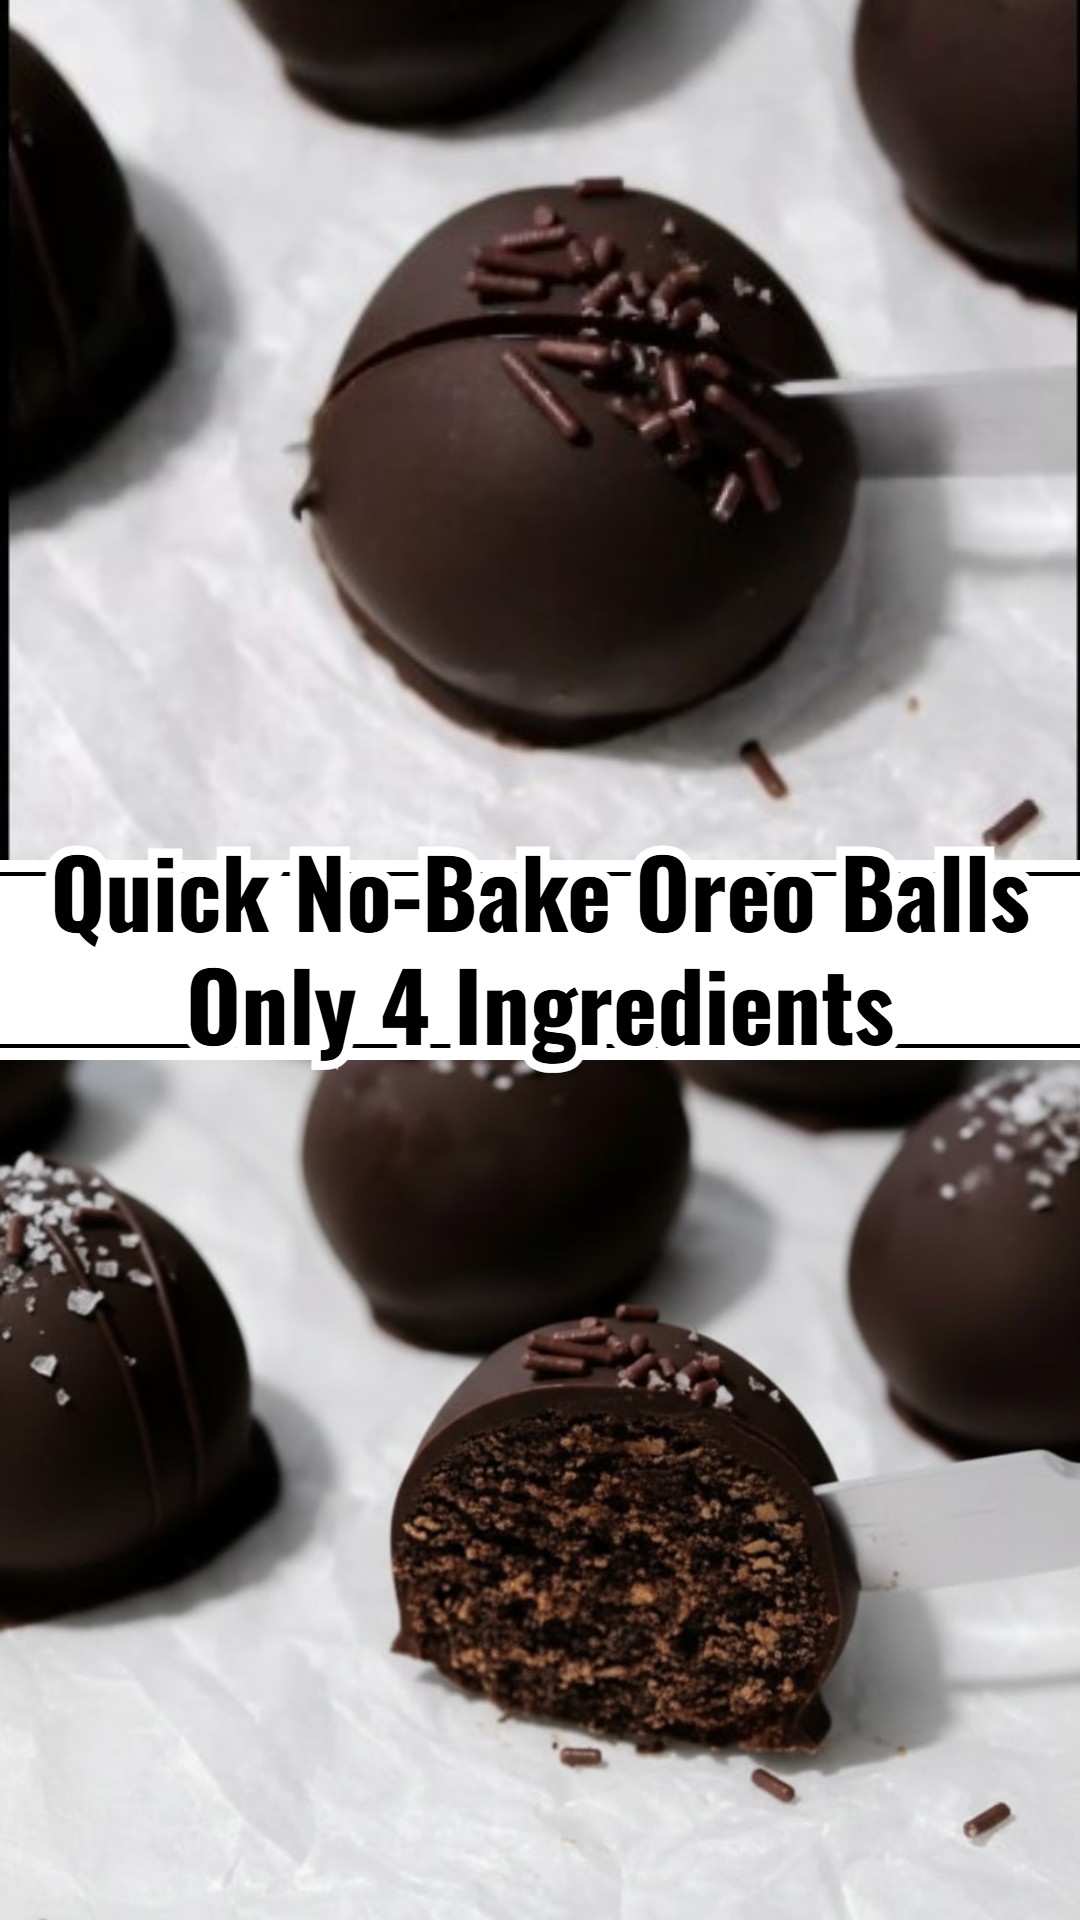
- Coat the balls: Dip each chilled Oreo ball into the melted chocolate, turning to fully coat. Use a fork or a dipping tool to gently lift the ball out, allowing excess chocolate to drip off.
- Set and decorate: Place the coated balls back on the parchment-lined baking sheet. If desired, sprinkle with extra crushed Oreos, sprinkles, or a drizzle of contrasting melted chocolate before the coating sets. Return to the refrigerator for another 30 minutes, or until the chocolate is fully set.
Tips & Variations
- Perfectly Rollable Mixture: If your Oreo mixture feels a bit too sticky, a quick 10-15 minute chill in the fridge works wonders. Conversely, if it’s too crumbly, gradually add a tiny bit more melted butter (half a teaspoon at a time) until it’s perfectly pliable for rolling.
- Silky Smooth Chocolate Dip: For a flawless chocolate coating, ensure your melted chocolate isn’t overly hot. Work efficiently, and if the chocolate thickens, a brief, gentle reheat will bring it back. A secret tip: a teaspoon of coconut oil added to the melting chocolate will give you an even glossier, thinner finish!
- Endless Flavor Adventures: Don’t limit yourself to classic Oreos! Experiment with different flavored varieties like mint, peanut butter, or golden for exciting twists. A pinch of espresso powder can elevate the flavor to a mocha dream, or a dash of peppermint extract can add a festive touch.
- Gorgeous Garnish Ideas: Elevate your Oreo balls with simple toppings! Before the chocolate sets, sprinkle with flaky sea salt, finely crushed nuts, or colorful sprinkles for any occasion. A contrasting drizzle of melted white chocolate also adds an elegant flair.
Serving & Storage Suggestions
These irresistible 4-Ingredient Oreo Balls are incredibly versatile and perfect for practically any gathering or a simple sweet craving! Present them beautifully chilled on a decorative platter as an impressive yet easy party dessert, an unexpected treat in lunchboxes, or a delightful gift for loved ones during holidays. For a polished touch, consider nestling them in mini cupcake liners. Any leftover bliss balls will stay fresh and delicious in an airtight container in the refrigerator for up to two weeks. For longer enjoyment, they freeze wonderfully for up to a month; simply thaw them in the fridge before serving to regain their perfect texture.
And there you have it, fellow home cooks – a truly delicious, incredibly simple, and utterly satisfying dessert that comes together without ever needing to turn on your oven! I’m genuinely excited for you to try these fantastic 4-Ingredient No Bake Oreo Balls. They truly prove that sometimes, the easiest recipes yield the most delightful results. We at Delicious Easy Cooking would absolutely love to hear from you; if you whip up a batch, please share your thoughts and experiences in the comments section below! Happy no-bake creating!
4 Ingredient Oreo Balls No Cream Cheese

Whip up these incredibly simple, no-bake Oreo balls using only four ingredients, completely free of cream cheese or sweetened condensed milk for a delightful treat.
Ingredients
- 1 (14.3 oz) package Oreo cookies
- 1/2 cup unsalted butter, melted
- 1 teaspoon vanilla extract
- 10-12 oz chocolate melting wafers or chocolate chips
Instructions
- Prepare the Oreos: Place the entire package of Oreo cookies (cream filling and all) into a food processor. Pulse until finely ground into crumbs. If you don't have a food processor, place the cookies in a large zip-top bag and crush them with a rolling pin until fine.
- Combine ingredients: Transfer the Oreo crumbs to a large mixing bowl. Add the melted butter and vanilla extract. Mix well with a rubber spatula or spoon until the mixture is thoroughly combined and starts to come together.
- Form the balls: Roll the mixture into 1-inch balls. The mixture should be easy to handle and hold its shape. Place the formed balls on a baking sheet lined with parchment paper or wax paper.
- Chill: Place the baking sheet with the Oreo balls in the refrigerator for at least 30 minutes to firm up. This will help them hold their shape when coating.
- Melt the chocolate: While the balls are chilling, melt the chocolate melting wafers or chocolate chips. You can do this in a microwave-safe bowl in 30-second intervals, stirring after each, until smooth. Alternatively, use a double boiler.
- Coat the balls: Dip each chilled Oreo ball into the melted chocolate, turning to fully coat. Use a fork or a dipping tool to gently lift the ball out, allowing excess chocolate to drip off.
- Set and decorate: Place the coated balls back on the parchment-lined baking sheet. If desired, sprinkle with extra crushed Oreos, sprinkles, or a drizzle of contrasting melted chocolate before the coating sets. Return to the refrigerator for another 30 minutes, or until the chocolate is fully set.
