Step-by-Step Instructions
- Cream Butter and Sugar: In a large bowl, cream together the softened butter and granulated sugar with an electric mixer until light and fluffy.
- Add Wet Ingredients: Beat in the eggs one at a time, then stir in the vanilla extract until well combined.
- Combine Dry Ingredients: In a separate bowl, whisk together the flour, baking powder, and salt.
- Combine Wet and Dry: Gradually add the dry ingredients to the wet ingredients, mixing on low speed until just combined and a soft dough forms. Do not overmix.
- Chill Dough: Divide the dough in half, flatten each half into a disk, wrap tightly in plastic wrap, and refrigerate for at least 30 minutes (or up to 2 hours).
- Prepare Candies: While the dough chills, unwrap and separate your hard candies by color. Place each color into a separate heavy-duty Ziploc bag. Crush the candies into fine pieces using a meat mallet or rolling pin. Alternatively, pulse them in a food processor.
- Preheat Oven & Prep Sheets: Preheat your oven to 375°F (190°C). Line baking sheets with parchment paper or silicone baking mats.
- Roll and Cut Dough: On a lightly floured surface, roll out one disk of chilled dough to about 1/4 inch thickness. Use larger cookie cutters to cut out shapes. Then, use a smaller cookie cutter (like a mini circle, star, or heart) to cut out the center of each larger cookie, creating a “window.” Carefully transfer the cutout cookies to the prepared baking sheets. Reroll scraps as needed.
- Fill Windows: Spoon the crushed hard candies into the cut-out centers of the cookies. Don’t overfill, as the candy will melt and spread.
- Bake: Bake for 8-10 minutes, or until the edges of the cookies are lightly golden and the candy centers are completely melted and smooth. Keep a close eye on them, as baking times can vary.
- Cool: Let the cookies cool completely on the baking sheet for at least 15-20 minutes before carefully transferring them to a wire rack. The melted candy needs to harden completely, which can take a bit of time. If you move them too soon, the “glass” centers will be sticky and potentially crack.
Full Ingredients
- 1 cup (2 sticks) unsalted butter, softened
- 1 1/2 cups granulated sugar
- 2 large eggs
- 1 teaspoon vanilla extract
- 3 cups all-purpose flour
- 1 teaspoon baking powder
- 1/2 teaspoon salt
- Approximately 1 cup (or 16-20 pieces) hard candies (Jolly Ranchers, lifesavers, etc.), sorted by color
Shopping List
- Dairy & Eggs: 1 cup (2 sticks) unsalted butter, 2 large eggs
- Pantry: 1 1/2 cups granulated sugar, 1 teaspoon vanilla extract, 3 cups all-purpose flour, 1 teaspoon baking powder, 1/2 teaspoon salt
- Candy: Approximately 1 cup hard candies (Jolly Ranchers, lifesavers, etc.)
Equipment Needed
- Large mixing bowl
- Electric mixer (handheld or stand)
- Rolling pin
- Cookie cutters (various shapes, including smaller ones for the center)
- Baking sheets
- Parchment paper or silicone baking mats
- Small, heavy-duty Ziploc bags or a food processor
- Meat mallet or rolling pin (for crushing candy)
- Wire cooling rack
Variations & Serving Ideas
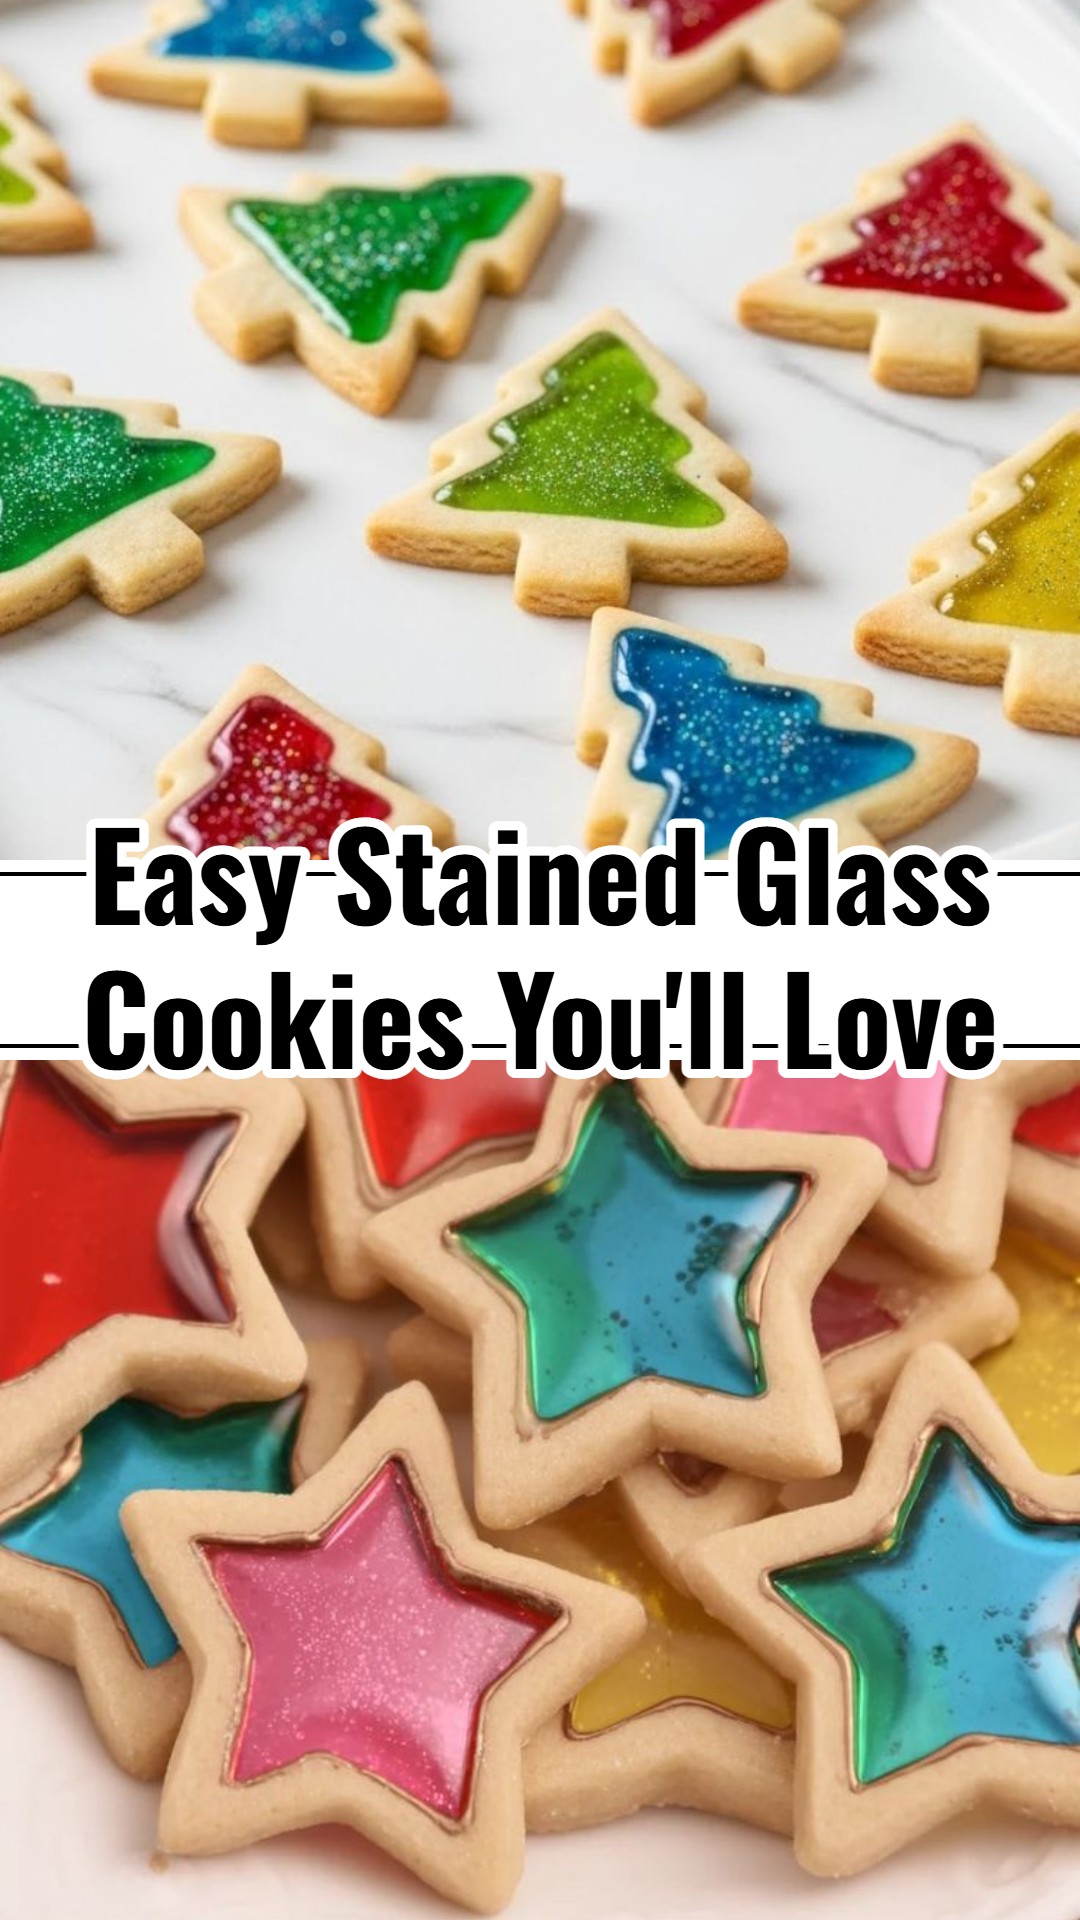
These dazzling Easy Stained Glass Christmas Decorating Cookies are incredibly versatile for the festive season! They make a show-stopping addition to any holiday dessert spread, ideal for cookie exchanges, or a joyful companion to a mug of hot chocolate on a chilly evening. For an extra touch of magic, why not transform them into edible ornaments? Simply use a skewer or toothpick to create a small hole at the top of each cookie before baking, thread a ribbon through once cooled, and hang them on your Christmas tree! Presenting them is easy: arrange them elegantly on a festive platter, or package them individually in clear bags tied with a festive bow for charming homemade gifts. To ensure they stay perfect, store any remaining cookies in an airtight container at room temperature, making sure the candy centers are completely firm before stacking to avoid any sticking.
I truly hope you adore making and sharing these absolutely magical Easy Stained Glass Christmas Decorating Cookies as much as I do! They infuse the holiday season with such a unique sparkle and delicious joy. Give this ‘Easy Recipe Sweet’ a try, unleash your creativity, and don’t forget to share your beautiful creations with us in the comments below. Happy baking and happy holidays! #HowToMakeGlassCookies #EasyRecipeSweet #ChristmasDecoratingCookies #GlassesCake #EasyChristmasBiscuits #CuteChristmasSnackIdeas #JollyRancherCookies #KifflesCookies #ChristmasSweetIdeas
